Here is a video of how the pianola looked and sounded a couple of months later; much cleaner, in full working order and pretty much in tune! There is still some work to do, such as repair the back and fix the casters.
Certain parts were broken and required mending, however most including the hammers were recoverable using glue and cotton thread.
The tuning pins were very worn and several could not be turned. The shape of the pins was different to modern hammers and we had some difficulty in getting hold of an appropriately-shaped tuning tool. After a couple of abortive attempts at buying tuning tools from ebay, Ian asked Paul – his engineer brother – for some help, and sent him one of the tuning pins. Paul duly made a socket which exactly fitted the pin, and could be fixed onto the end of a socket wrench for manoeuvrability.
(picture to follow)
A vacuum cleaner and brush came in handy for the next stage. All the keys were removed and cleaned, and the underlying felt was checked. This turned out to be in fair condition so the originals were put back into position. The piano parts and mechanisms were all cleaned and checked over – the hammers, dampers , strings, frame, etc.
Naturally Ian couldn’t resist giving it a little play first… it sounded truly awful, out of tune and difficult to pedal. Here is a short video of what was probably the first time it had been played in many years:
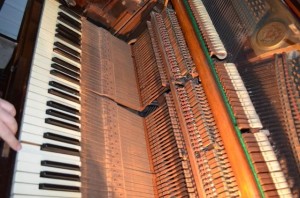
The first task was to take the pianola apart to ascertain its condition and start the cleaning process. Here we go – Ian is checking which keys work or are working but a bit ‘sticky’. The other photos show the condition of the 100 year-old tubing.
Hello and welcome to Ian’s Pianola Restoration and Repair Project blog.
This is the story of how Ian bought a non-working “spares or repairs” pianola from eBay for £5, eventually got it home, cleared some space in the garage and spent many days restoring and repairing it to make it fully working.
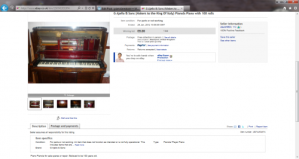
Here is the original ebay advert:
£5 was quite a bargain, or so we thought! Unfortunately buying something on ebay is only the start and it took 3 abortive attempts and a very understanding and patient seller before getting it transported from Blackpool to Nottingham. Here is our pianola-moving advice, born of experience:
- Avoid local delivery companies – a ‘man with a van’ will probably find the pianola too heavy or big, and their vans may not have the necessary ramp or tail-lift.
- Avoid Jonill’s of Nottingham – they let us down on the collection day, bizarely informing us by text that they wanted more money than the agreed quote and the driver wasn’t feeling well so couldn’t do it that day anyway.
- Use national and international piano-moving specialist Pianospeed www.pianospeed.com – who gave a reasonable quote and turned up at the appointed date and time to collect the pianola and deliver it to Nottingham safe and sound.
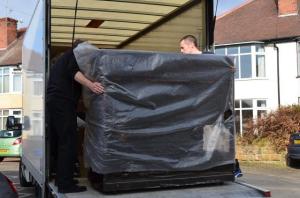
Here it is arriving! 3rd March 2012.


